
Last updated on October 31st, 2022 at 01:36 pm
How to install lets encrypt free ssl tls manually Cpanel
Lets Encrypt is a free and Opensource SSl that provides free Wildcard SSL certificate for multiple subdomains.
This tutorial goes through the process of installing Lets Encrypt SSL certificate to a website on a Cpanel Server manually without using the Lets Encrypt plugin as available on Truehost Cloud Servers.
- Lets Encrypt has appointed sslfor free.com to generate and issue free Lets Encrypt SSL.
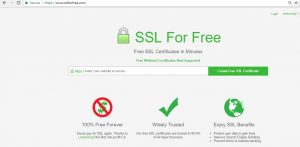
Go to www.sslforfree.com
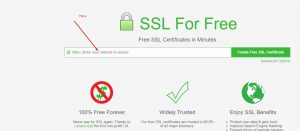
2. Enter your website domain name as shown below to check and generate the SSL for your website
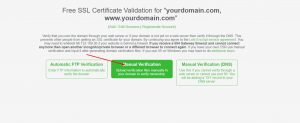
3. Then it will show how to verify domain ownership. In this case, we will choose the manual domain verification for manual domain installation
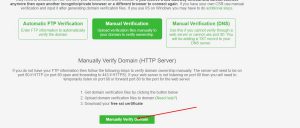
4. An advance option that allow to manually verify domain from a http server
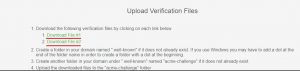
5. The website will generate two domain verification files for upload to your Cpanel server.
Click on the two download files generated to download to your computer.
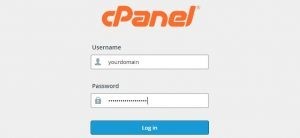
6. On your browser go to http://yourdomain.com/cpanel
Login to your domain Cpanel account
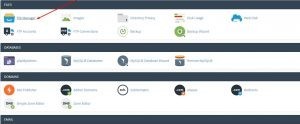
7. After login, click on File Manager option
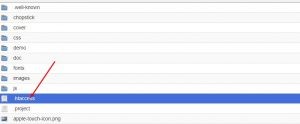
8. Click on the File Manager to Open your website file system, proceed to click on Public_html to enter into the directory.
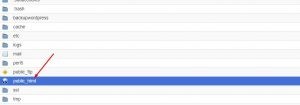
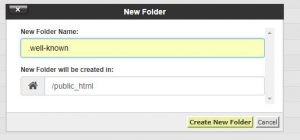
Click on +folder icon to create a folder and name it .well-known
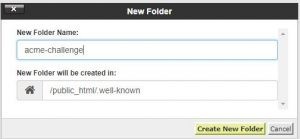
Inside .well-known folder create another folder called acme-challenge
Inside acme-challenge folder upload the two files from sslforfree website
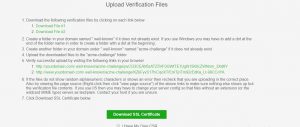
Follow the links displayed on sslforfree website to verify the downloads and consequently the domain.
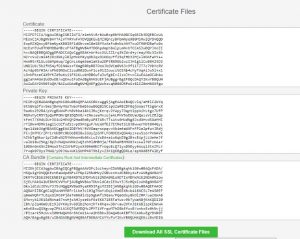
Click on Download the SSL
This will generate the SSL certificate files including CA Bundle, Private Key and Certificate
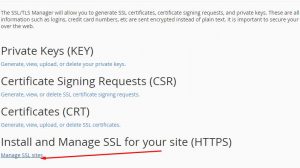
In your Cpanel go to Security section
Click on SSL/TLS
The go to Manage SSL sites
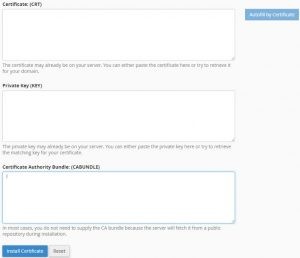
Copy paste the content of the CA Bundle, Private Key and Certificate in the respective content boxes.
Click Install Certificate to Install the SSL certificate
The final step and very important is to force all traffic through the https protocol.
Go to public_html directory and click to edit .htaccess
In case you are unable to see the .htaccess file click on settings button on the right hand corner of your Cpanel and click to show hidden files including .htaccess
Copy paste the following code to force https
RewriteEngine On
RewriteCond %{SERVER_PORT} 80
RewriteRule ^(.*)$ https://www.yourdomain.com/$1 [R,L]
Click Save to save the .htaccess file update.
Access the website on browser now.
Bingo you just did it